How to Make Stationery with Logo in Minutes?
A company logo is the first impression that your company gives to potential consumers and the business cooperators. A good logo symbolizes the culture and spirit of your enterprise. Evidently, it is a good choice to make your company's logo appear on the stationery of your business, which can leave a more professional impression to your customers and cooperators. So would you like to realize this? Just following this article, i will show you how to design a professional logo as well as how to add the logo created on the official stationery of your company.
1. How to create a professional logo in minutes?
Suggested Tool: Sothink Logo Maker. This program offers 190+ templates, 600+ color schemes (each scheme includes one main color and three assorted colors), ready-to-use effects and rich logo graphic resources, which can help even novice design a professional logo with easy steps.
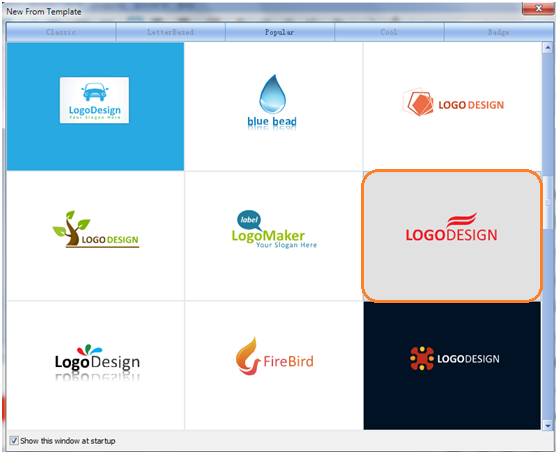
Step 1: Choose a Template
Launch the program and a "New From Template" window will pop up. Select a prefered one for your own logo designing.

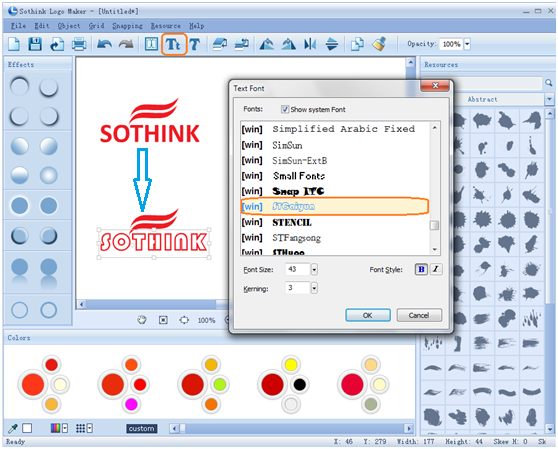
Step 2: Edit Text

Step 3: Change Text Font

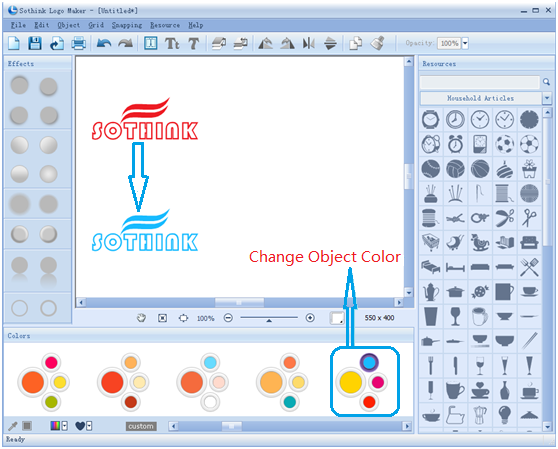
Step 4: Change Object Color

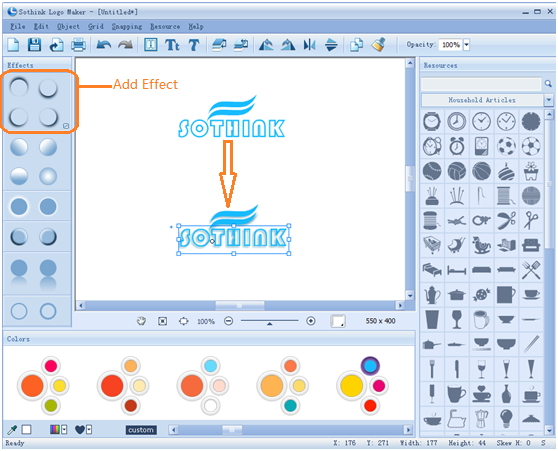
Step 5: Add Effect

Step 6: Export Logo

2. How to add the logo created on the official stationery of your company?
To illustrate, we will add the logo created just now to the page header in Microsoft Word.
Step 1: Add Logo Image
Click add image button when editing the page header and import the logo image prepared now into the header.

Step 2: Adjust Logo Size
Use the crop function of Word to adjust the logo image to a suitable size you like. Then you can change the logo place on your header.

Step 3: Add Contact Information
To make your stationery look more professiaonl, you can add some contact information to the header, such as the website URL of your company, telephone, email address, etc.

A letterhead with logo and contact information is finished now. How easy! Just enjoy!

